Friday 15 May 2015

Happy 60th birthday, Kermit

This week, Kermit the Frog celebrates his 60th birthday (yaaaaaaay!)

Kermit made his first appearance on 9th May 1955 in a show called 'Sam & Friends'.  He was originally made from Jim Henson's mothers (discarded) green wool coat.  


Kermit went where Jim went; next to pre-schoolers educational show, Sesame Street where he appeared as a roving television news reporter. It was around this time that a harlequin style frill was added around Kermit's neck to make him more frog-like. The collar was functional as well: it covered the joint where the Muppet's neck and body met. 
I grew up watching Sesame Street  & it still holds a warm place in my heart

After Sesame street, Jim struggled to have his next project, the Muppet Show commissioned on US TV as he was associated with producing material for children.  It was actually Lew Grade from ITV who commissioned the show to be made, for British Audiences (thank-you Lew!)


Kermit was widely recognised as being an alter ego for Jim Henson.  A fact that Henson himself acknowledged.  Kermits role on the Muppet show was often compared by his co-workers to Henson's role, though he thought that Kermit was bolder than he; he once said of the character, "He can say things I hold back"


I love Jim Henson - he features high on my list of superheroes.  What I love most is his gentle quirky humour and great imagination & creativity.  He could make something profound from something very simple and his work never fails to make me laugh out loud


Here Jim Henson talks to us about Kermit in a very gentle and revealing interview


Lovely clip in which Jim Henson tells us how to make & work a simple puppet - a lovely film to introduce kids to puppetry and making


Wednesday 13 May 2015

superhero cape workshop Ottie & the Bea

On Saturday I held a workshop at my favourite children's shop ottieandthebea

In just two hours five 5 year old budding superheroes (and one four and a half year old) produced brilliant designs & translated them into fabric to create their own superhero character cape (fave superhero name of the day "super bad guy boy" a goodie AND a baddie rolled into one!)

When Im working in fabric with kids, we always start by designing or working out ideas on paper.  I find that this allows thinking time & children always produce more interesting work if they have time to explore their ideas first.  Sometimes the work is translated fairly literally onto fabric whilst other times the kids become absorbed in process - painting, appliqué, stitch; and the results take a different route, but the expression of the original idea is usually retained and this does make for really interesting results!

Here's some of what we made....


Big thank you to the wonderful Julia and to Cat for her help!

Tuesday 21 April 2015

pssst... behind the scenes photoshoot secrets revealed!


Guess how we made the 'confetti curtain' which we used during our latest headdress photoshoot...?


These are the eyeholes which are punched out when we cut out our eye masks using the leather press.  We saved and saved them up and talulah glued and stitched them all together in rows, suspended like colourful rain droplets.  


We placed the curtain in-between the camera and the models to add some extra colour and movement .  Ta-daa!


Monday 20 April 2015

behind the scenes.... at our latest photoshoot

We have been busy photographing our new headdresses!

Here's a little sneak peak behind the scenes....


The day
Meet Freya who is putting the finishing touches to our colourful props - nicknamed 'the confetti curtain' and 'flaming hula hoop'


The table laden with headdresses in exciting new colours waiting to be tried on and photographed


Freya providing some behind the scenes magic.  We shredded many, many, many sheets of tissue paper to create this colourful confetti


the end result!

*****

Photographing new pieces has always been my favourite part of my working process.  It's when the pieces really come to life for the first time and I am able to convey the spirit in which they were conceived and intended to be worn. 

I'm utterly transfixed to see how kids react when they dress up.  Just the simple act of putting on a costume can transform a child's relationship to the world; changing the way they move and act; transporting them to an inner world that they so easily inhabit...  Its a little bit of magic which I wish I, as an adult,  could re-capture as easily!

Seeing and the joy and exuberance that my costumes bring really is the best part of what I do. Our models for this shoot embraced the party mood without any hesitation, helped by lots of playful props and a flurry of colourful confetti!

*****


Credits
A huge thank you to asylum london for allowing us to use their gorgeous chapel as a location 
to Barry Woods for the stunning photographs 
to the hugely talented talulah mason for creating our props 
to Freya Millward for working all her behind the scenes magic
and to our very special models Bea and Ella


Thursday 16 April 2015

It's been a long time....

Hello!
We have been away for a while.... and have missed you!
Here's a short re-cap about what we have been up to....

We now are active on all social media fronts
You can find us here:


Please join us, say hello and post any pictures of yourselves dressed up and looking fabulous (either in your own creations or our costumes) using #iwishiwasa


We are working on a new website and new look for the blog 
PLUS lots of exciting new products
Watch this space...


Here is a peek at our new superhero ID cards which will be sent out with all orders placed directly or via etsy

Superhero ID cards award you membership to an EXCLUSIVE club of superheroes.  There is space to fill in your own deets including superhero name & special powers as well as space to draw your own portrait and action shot!


TTFN... please keep tuned in for REGULAR blog posts!!!!!


Wednesday 2 October 2013

Stitch Club... bananas & apples (and strawberries!)

For the past year I've been teaching Stitch Club (an after school club) at my son's primary school in South London.  I really wanted to share some of the amazing work which the kids have made - this group is from years 3 & 4 (ages 6-8).

I feel that my role is to enable & support the children (with the tricky bits like threading needles)  but I really believe in them doing all of the work themselves - the experience is valued rather than getting hung up on the result - although I think the results are stunning and so much more exciting than if an adult had 'helped'

This is the first project we did in stitch club - in the true artisan/maker tradition - making our own tools...    it's a fruit pincushion!


This is a great project to introduce children to sewing


Instructions

1 draw your fruit shape on paper (actual size you want the finished pincushion to be ) and cut out - draw stalks & leaves separately

2 pin your template onto fabric and cut two pieces - front & back.  Also cut one stalk & 1-2 leaves if using*
* use a fabric which won't fray - felt is ideal.  we used some old blankets I sourced from the charity shop  & put in the washing machine to felt

3 If you want to add any decoration ie: stitching along banana, 'seeds' on strawberry - stitch on at this stage (before making up)
This is a good opportunity for kids to look carefully at the real fruit & hone their observational skills!

4 pin the back & front pieces together & insert stalk/leaves in between layers (pin in place)

5 stitch front & back together around the edges using straight stitch or whip stitch (or blanket stitch for advanced stitchers)
When you get to the area where the stalk meets the fruit, change to straight stitch (stitching through all layers)  then back to whip stitch again.  Go most of the way around the fruit edge but remember to leave a gap to push in the stuffing

6 stuff your fruit**  we used an old pillow and removed the stuffing (hollow fibre as opposed to feathers!!)

7 sew up the remaining gap and your pincushion is complete!

Sunday 22 September 2013

Gever Tulley's Tinkering School


Gever Tulley is my new hero.  Author of 50 Dangerous Things (you should let your children do); advocate of learning & creativity through play, exploration and doing;  founder of the tinkering school


I proudly admit that my son has done all 5 of the 'dangerous' things he talks about in his TED lecture (watch below)


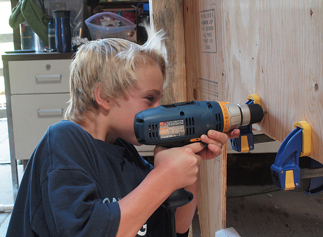
Photos of child led, group projects from The Tinkering School


see more images here:  tinkering school photo gallery


Gever Tulley has not stopped here; an educational innovator, he has co-founded a new, extraordinary & totally exciting educational model,  the brightworks school.   Imagine what kind of world we could create if this is how we taught all of our kids...